Camera control
Direct a 360 orbit shot with intent.
Camera circles completely around a locked central subject, revealing the environment through continuous parallax. FoxCut packages the spatial instruction as a reusable control so you can focus on the subject, scene, and reason for the move.
Core controls
What 360 Orbit AI Camera Movement needs to control.
What the move communicates
Camera circles completely around a locked central subject, revealing the environment through continuous parallax.
Composition first
Give the model foreground, midground, background, and a clearly framed subject so the movement has visible spatial evidence.
Control the strength
Start with a moderate value, then raise it only when the movement is too subtle rather than rewriting the complete scene.
Motion test design
Make the 360 orbit visible enough to evaluate.
The scene is designed as a motion test chart: a stable anchor and readable geometry make it easier to distinguish the requested move from its nearest false positive.
Source scene
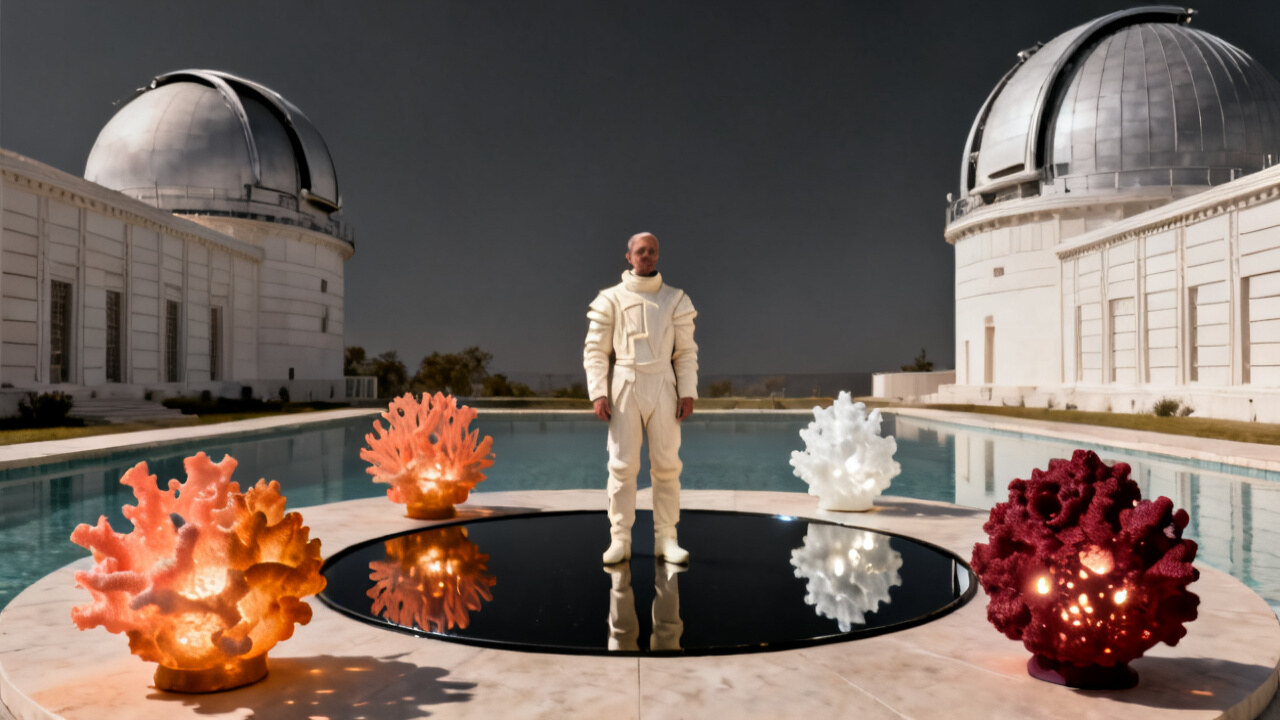
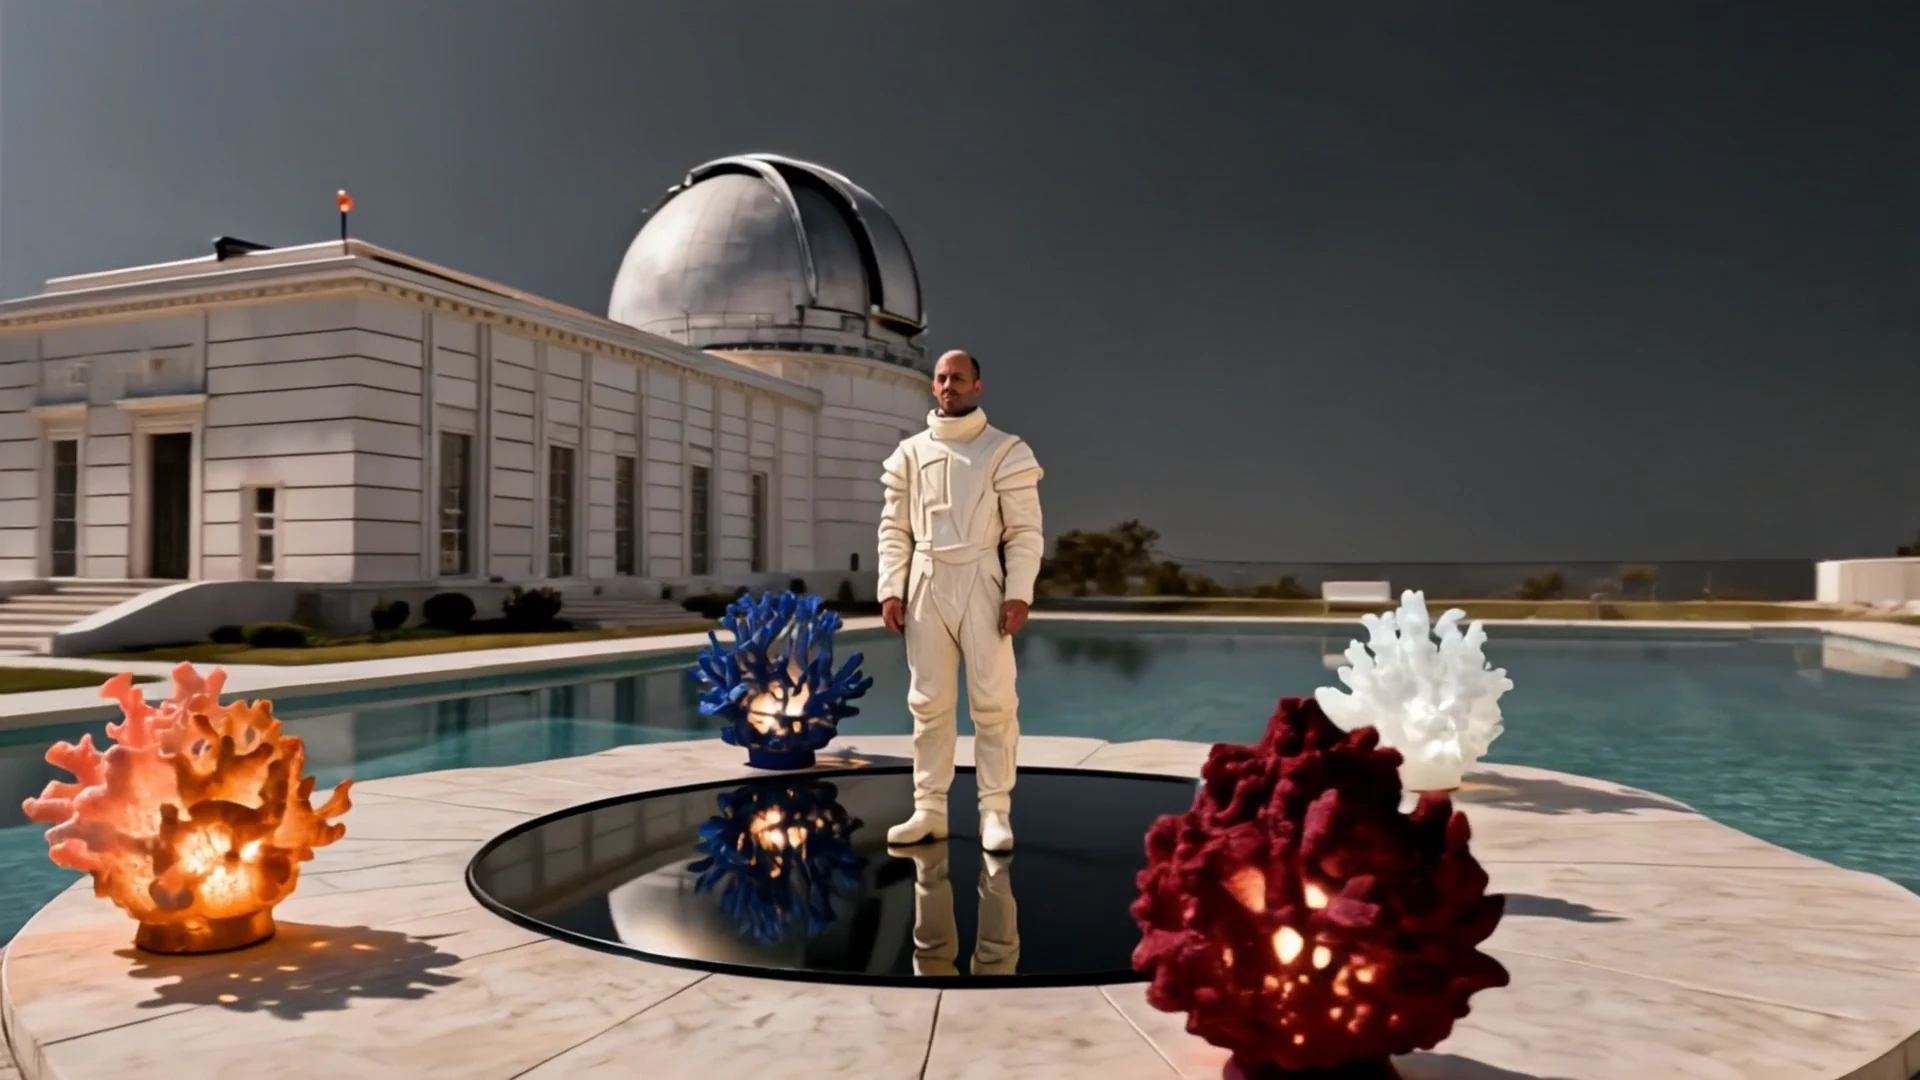
a fictional adult astronomer in a sculptural ivory suit standing perfectly still at the center of a shallow circular black mirror, four distinct coral, amber, white, and burgundy light sculptures around the pool, observatory architecture continuing on every side
Expected evidence
complete level orbit around the astronomer, who stays readable and near center throughout
Control under test
camera performs one smooth 360-degree orbit around the subject, subject remains perfectly centered and consistent throughout. Preview motion strength: 100%.
Evidence basis, checked 8/28/2026: One generated or validated FoxCut preview with measured duration and explicit expected motion. This is a shot study, not a cross-model benchmark.
Prompt direction
Start with a shot brief, not a keyword pile.
“camera performs one smooth 360-degree orbit around the subject, subject remains perfectly centered and consistent throughout”
Practical planning
What to decide before using 360 Orbit.
a fictional adult astronomer in a sculptural ivory suit standing perfectly still at the center of a shallow circular black mirror, four distinct coral, amber, white, and burgundy light sculptures around the pool, observatory architecture continuing on every side This staging is not incidental: it creates the visual landmarks needed to tell whether 360 orbit happened physically rather than being imitated by subject movement, reframing, or a digital scale change.
Direct the shot as “camera performs one smooth 360-degree orbit around the subject, subject remains perfectly centered and consistent throughout”. Keep the scene description separate from that camera instruction, use the recorded preview strength of 100%, and judge the path against this expected evidence: complete level orbit around the astronomer, who stays readable and near center throughout.
- What the move communicates: Camera circles completely around a locked central subject, revealing the environment through continuous parallax.
- Composition first: Give the model foreground, midground, background, and a clearly framed subject so the movement has visible spatial evidence.
- Control the strength: Start with a moderate value, then raise it only when the movement is too subtle rather than rewriting the complete scene.
Quality control
How to review a camera control result.
The nearest false positive for 360 orbit is a result that creates similar energy without the requested camera mechanics. Protect the subject anchor, horizon, depth cues, and landing frame; if one of those fails, revise that constraint before increasing motion strength. If the buildings, pool, or coral change identity mid-orbit, the move did not hold. Subject lock is not enough.
A useful review follows the workflow in order: stage the scene, then apply the control, then evaluate the camera. Change one variable per comparison so the next render answers a specific question.
- Stage the scene: Choose a subject and environment whose depth and geometry support the intended movement.
- Apply the control: Select 360 Orbit, then set duration, strength, aspect ratio, and a compatible video model.
- Evaluate the camera: Review trajectory, subject stability, horizon, parallax, and whether the move reaches a clear ending.
How it works
A practical Camera control workflow.
- Step 1
Stage the scene
Choose a subject and environment whose depth and geometry support the intended movement.
- Step 2
Apply the control
Select 360 Orbit, then set duration, strength, aspect ratio, and a compatible video model.
- Step 3
Evaluate the camera
Review trajectory, subject stability, horizon, parallax, and whether the move reaches a clear ending.
Built for real work
Use cases
- Narrative filmmaking
- Commercial direction
- Social and music video
- Previsualization
Continue exploring
Related FoxCut workflows
Questions to resolve
360 Orbit AI Camera Movement FAQ
What should I prepare before using 360 Orbit AI Camera Movement?
a fictional adult astronomer in a sculptural ivory suit standing perfectly still at the center of a shallow circular black mirror, four distinct coral, amber, white, and burgundy light sculptures around the pool, observatory architecture continuing on every side This staging is not incidental: it creates the visual landmarks needed to tell whether 360 orbit happened physically rather than being imitated by subject movement, reframing, or a digital scale change. Start with choose a subject and environment whose depth and geometry support the intended movement.
How should I evaluate the result?
Direct the shot as “camera performs one smooth 360-degree orbit around the subject, subject remains perfectly centered and consistent throughout”. Keep the scene description separate from that camera instruction, use the recorded preview strength of 100%, and judge the path against this expected evidence: complete level orbit around the astronomer, who stays readable and near center throughout. Review the output against the intended use, not against a vague idea of visual quality.
What is the most common failure to watch for?
The nearest false positive for 360 orbit is a result that creates similar energy without the requested camera mechanics. Protect the subject anchor, horizon, depth cues, and landing frame; if one of those fails, revise that constraint before increasing motion strength. If the buildings, pool, or coral change identity mid-orbit, the move did not hold. Subject lock is not enough.
Make the shot. Keep the vision.
Move from prompt to directed generation with camera, character, reference, model, and workflow controls in one studio.
Generate with 360 Orbit